Introduction
There are numerous types of plasterboard, each designed for a specific application. The most popular varieties of plasterboard at Insulation Superstore are vapour control plasterboard and impact protection plasterboard, but the true favorites of builders, homeowners, and specifiers are listed below.
Moisture-resistant plasterboard
Some additives that repel moisture are found in the core of moisture-resistant plasterboard. These are the only plasterboards that are ideal for kitchens and bathrooms, as the humid climate will otherwise degrade the quality of the board over time, resulting in a loss of the efficiency of any insulating features. Using non-moisture-resistant plasterboard in a moist environment will eventually lead to damp, decay, and mould.
Acoustic plasterboard
If you choose acoustic plasterboard, you will gain benefits beyond simply being able to finish the space. Acoustic plasterboard will keep noise out of the room and limit noise transmission between rooms, providing a more private and comfortable environment for those who live there. Using acoustic plasterboard in a living room renovation, for example, will ensure that a loud movie does not disrupt a peaceful conversation in the kitchen.
Fire-resistant plasterboard
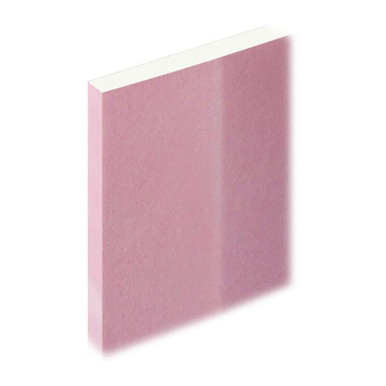
Plasterboard that is fire-resistant does exactly what it says on the tin. Because each rating implies a distinct item, it's critical to become acquainted with and select the appropriate fire performance rating. Some fire-resistant plasterboard is non-combustible, while others provide 240 minutes of fire resistance before catching fire. If fire-resistant plasterboard isn't required and is only an optional extra, it's important deciding on the best alternative for your application. If it is supplied, select the appropriate performance rating to meet building codes.
Insulated plasterboard
Because it is so simple to install, insulated plasterboard is a favorite among dry liners. It's simply a piece of insulation board faced with plasterboard, but the fact that they're already bonded together and ready to go makes the process faster and more efficient than adding a layer of insulation followed by a layer of plasterboard. This type, like conventional plasterboard, can be finished without plastering over. With this straightforward video from Celotex, you can learn how to install insulated plasterboard.
The price of plasterboard
Plasterboard is a low-cost and adaptable building material that is used for wall partitions, wall linings, ceilings, roofs, and floors. It's suitable for a wide range of applications and has long been used as an alternative to wet plaster due to the fact that it doesn't need to cure and can be decorated immediately. Insulated plasterboard gives plasterboards even more adaptability because it allows you to insulate and render a partition wall or any internal wall faster than usual. This is also less expensive than purchasing a thin insulation board and laying plasterboard on top, both in terms of material and labor costs.
If you want to plaster the wall, square edge plasterboard is available, leaving you with a smooth and level finish that is ideal for decorating. Tapered edge plasterboard is also available for dry-lining the surface, allowing the boards to be painted over immediately, which is ideal for new dividing walls or circumstances where the wall is being upgraded to insulated plasterboard.
Insulated plasterboard will save you time and money on a quick renovation project. By adding a couple of millimeters to your wall, for example, between the kitchen and the living room, the TV may blare the latest film releases while someone enjoys a calm cup of tea.
PLASTERBOARD CUTTING TECHNIQUES
Plasterboard is a versatile material that can be used in a variety of situations; however, a lack of knowledge on how to cut and repair plasterboard prevents many people from using it in the first place. Plasterboard is easily sawn with a standard timber saw. With a fine-toothed saw, the finer the teeth, the better and cleaner the edge.
TOOLS NECESSARY FOR CUTTING AND FIXING PLASTERBOARD
- Drywall or plasterboard saw
- Plasterboard hammer
- Marker or pencil
- Plasterboard rasp
- Sandpaper
- Plasterboard knife
- Drywall screw
- Galvanised plasterboard nail
- Skim plaster
1. How to Make a Hole in a Plasterboard
Step one. Calculate the size of the cut you'll need to make on the plasterboard (measure as accurately as you can)
Step two. Mark the cut with a pencil.
Step three. Now, using a plasterboard hammer, bang 50mm inside one of the cut lines (Step 3 is a crucial step as it let you insert the blade of the saw to start with)
Step four. Insert the saw into the line created by banging the hammer and start cutting.
Step five. Check the progress of the cut on a regular basis to ensure that it stays where you've marked it.
Step six. Fine sandpaper can be used to remove any paper burrs.
Using variations on the above, you can cut out a variety of shapes.
2. How to Cut Straight Lines in Plasterboard
Step one. Place the Plasterboard sheet on a firm surface.
Step two. Calculate the length of the cut you want to make.
Step three. Make a pencil mark on the front side of the plasterboard where you want to cut.
Step four. Now, place a spirit level over the pencil mark on the piece of plasterboard that you want to use.
Step five. Using a Craft Knife or Stanley knife, cut a shallow mark into the plasterboard along the edge.
Step six. Check the progress of the cut on a regular basis to ensure that it stays where you've marked it.
Step seven. Turn the sheet over and give a sharp push towards the back of the plasterboard on one side of the cut. Step seven is an alternative. Move the sheet so that the backing is against a flat surface and the cut line is over an edge, then sharply push the part of the board extending over the edge towards the back.
Step eight. Fine sandpaper can be used to remove any paper burrs.
HOW TO REPAIR A PLASTERBOARD
Plasterboard is fastened in four different ways. It is screwed, nailed, glued, or stuck in place. It can be adhered with adhesive (the best are ultra-strong construction adhesives) or with a plaster mixture.
1. How to Repair Plasterboard Using Nails
Traditionally, the most common method of ficing the boards has been nailing plasterboard. While fixing the plasterboard with nails, use galvanised nails to prevent rusting. For 12.5mm plasterboard, 40mm nails were used, and for 9.5mm plasterboard, 30mm nails were used.
Step one. Mark a line on the plasterboard where the timber framework is (be careful not to nail through the timber frame).
Step two. Maintain a 150mm gap between nails across the timber framework.
Step three. Screws should not be installed within 12mm of the board's edge.
Step four. Hammer the nails in slowly until they are flush with the surface.
Note: Take care not to hammer too hard, as this may compromise the durability of the plasterboard core.
2. How to Install Plasterboard Using Screws
Plasterboard is screwed with drywall screws, which have a coarse biting thread that drives through the boards while maintaining a firm grip on them.
Step one. Mark a line on the plasterboard where the timber framework is (make sure the screws don't go through the timber frame).
Step two. Maintain a 100-200 mm gap between screws across the timber framework.
Step three. Screws should not be installed within 12mm of the board's edge.
Step four. Drill the screws inside slowly.
Step five. Check on a regular basis and stop when the screw head is just beneath the surface of the paper.
Take care not to drill too deeply as this may jeopardize the durability of the plasterboard's core.
3. How to Dot and Dab Plasterboard
Dot and Dab methods entail preparing a bucket of (usually) skim plaster to a fairly thick consistency and applying dots or blobs of this plaster to the back of the board to be fixed.
Direct bonding is another name for the dot and dab method.
Step one. Check the plasterboard adhesive's mixing instructions.
Step two. Mix the plasterboard adhesive according to the manufacturer's instructions until it reaches a creamy, thick consistency.
Step three. Apply a generous 'dab' of plasterboard adhesive to the plasterboard in dots every 20cm, as shown in the image above.
Step four. To ensure that the plasterboard is straight, use a spirit level to align it with the desired space.
Step five. Make sure to get the first board right because the rest of the boards will need to line up with it.
Step six. When you move away, press firmly until the plasterboard does not move.
Remember to leave a gap between the floor and the boards to reduce the risk of rising damp. This will be hidden by the skirting board.
HOW LONG DOES IT TAKE FOR DOT AND DAB TO DRY?
Dot and dab adhesive takes two to six hours to set, so you can do jointing or skimming on the same day. Plaster, on the other hand, takes two to three days to dry.
Gyproc DriWall Adhesive fully cures in about three hours and can be used for up to 90 minutes after application.


